Using UsdLight
You can create native USD lights in Katana using the UsdLight node. This node also allows you to edit existing USD lights that have been imported.
Tip: Each UsdLight node allows you to create one light at a time. While this node might be useful for smaller lighting setups, in most cases using the UsdGaffer node will be more flexible and faster as it allows the creation of multiple lights in one USD layer - see Using UsdGaffer.
Creating a Light
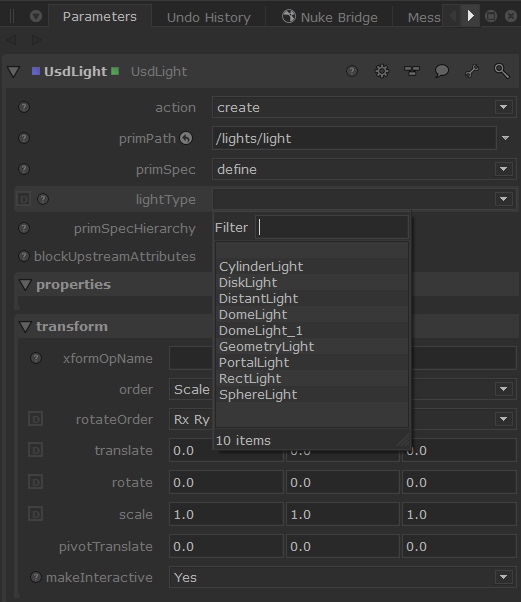
• Add a UsdLight node. In the Parameters, by default, the new primPath will be set to /lights/light and the primSpec will be set to define.
• In the action dropdown, create is selected by default, allowing you to create a new light.
• Choose a lightType from the dropdown. The list will include light types registered in the UsdSchemas and any render specific lights.
Basic lights you will usually find shown in the list here:
Then, adjust your light in the properties section:
• Inputs: Adjust light properties such as color, intensity and exposure.
• Shadow: Adjust shadow options such as the shadow color and falloff.
• Shaping: In the Shaping API section, you can toggle to activate and apply, as well as any parameters that come with it.
• Texture: Adjust texture options where relevant.
• Extent: Extent is a three dimensional range measuring the geometric extent of the authored gprim in its own local space (i.e. its own transform not applied), without accounting for any shader-induced displacement. Here you can categorise the geometry’s purpose and visibility.
• Light: Define shader ID and specify the relationship of the Material response to the lighting response.
• Transform (xformOpOrder): Transform lights that are Xformable.
Note: This section will show different options depending on the type of light you select.
Video: Learn how to use the UsdLight node to set up and manipulate your sequence level lighting - Katana 8.0 | Set up sequence lighting with USD.
Editing a Light
You can also edit existing lights using the UsdLight node.
• Add a UsdLight node.
• In the Parameters, in the action dropdown, to edit an existing light, select edit.
• Select your light’s location in the primPath field - this is the light you wish to edit.
• The light properties will then be populated and any edits you make will override it.
Video: Learn how to edit lights on a per-shot basis, all while utilizing native USD light creation - Katana 8.0 | Multi-shot lighting with USD.
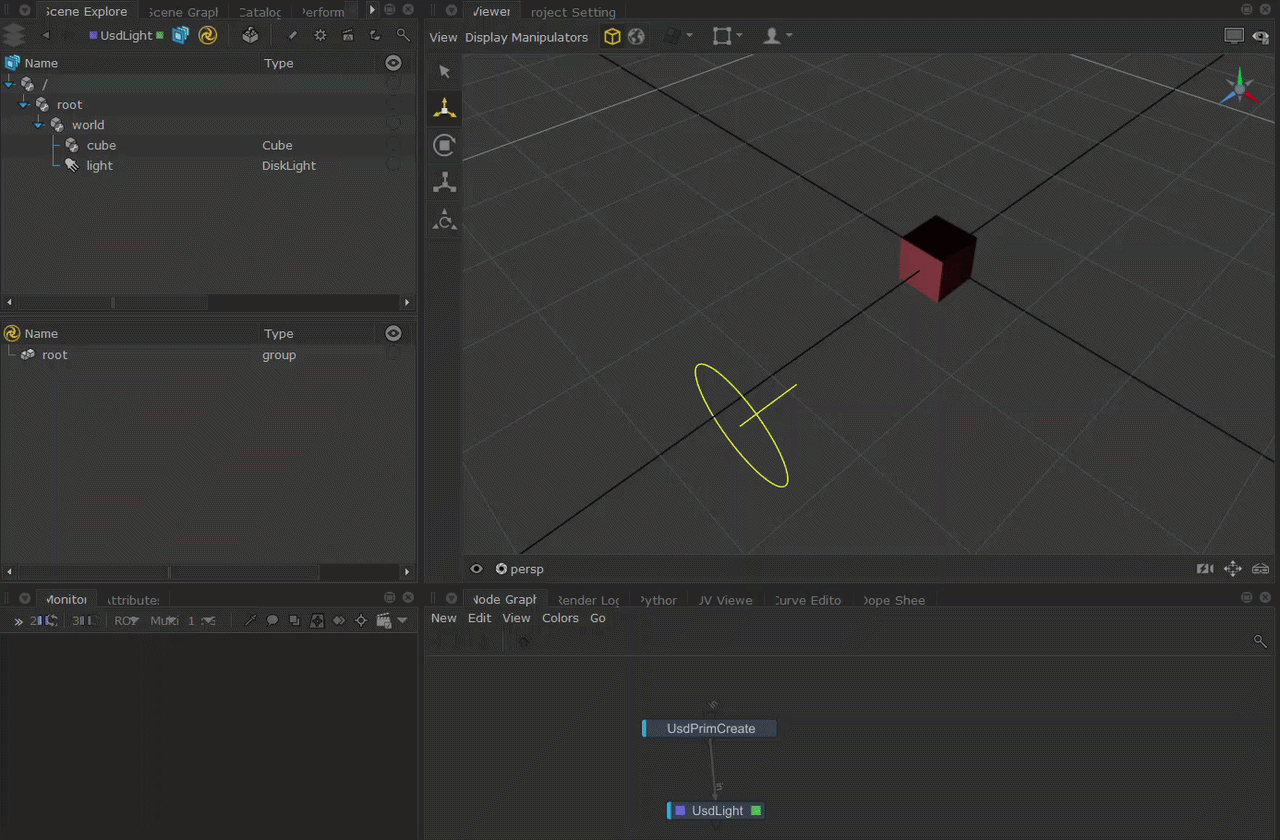
USD Lights in the Viewer
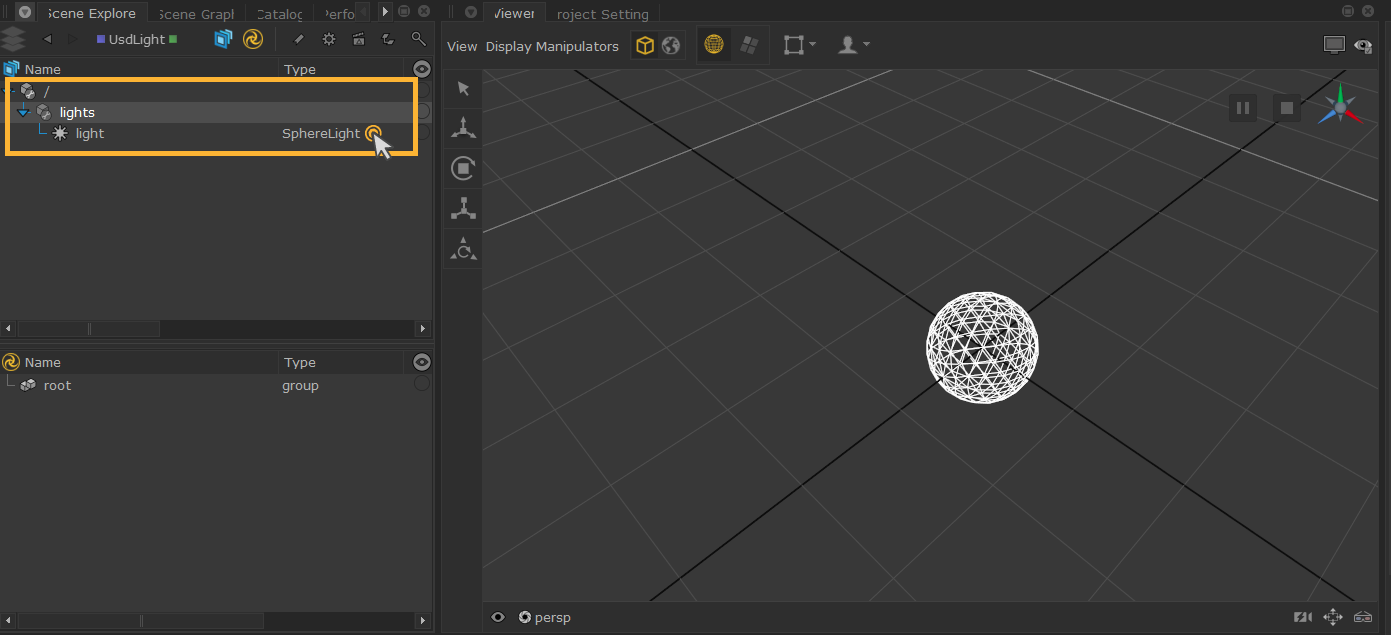
USD native light locators are now visible in the Viewer tab.
To view them, you can simply expand the Scene Explorer (double-click a prim path to expand all prims below) and the light created will display in the Viewer.
In this example, the Scene Explorer is expanded to the “light” prim path which will reveal it in the Viewer. Since it is a SphereLight (as described in the Type column), the relevant locators will display.
• CylinderLight
• DiskLight
• DistantLight
• DomeLight
• PortalLight
• RectLight
• SphereLight
Look Through Lights
You can look through USD lights in the Viewer to help with placement.
USD lights are not yet available to select via the Look Through Lights and Cameras menu at the bottom of the Viewer (this will display the currently viewed through camera - by default it will be set to the perspective camera persp). 
However, you can select your USD light in the Scene Graph and then click the button  (which appears next to the Look Through Lights and Cameras menu at the bottom of the Viewer) to look through the selected object. This can also be done by pressing K.
Tip: You can also middle-mouse drag a light from the Scene Explorer tab onto the Viewer tab to set it as the look-through light.
Light Transformations and Positioning
Use the Viewer manipulators to transform USD lights in the Viewer. UsdLight supports Translate, Rotate, Scale and Center of Interest.
Read more about Viewer Manipulators for Native USD.
You can also use the Lighting Tools manipulators with UsdLight. However, note that other components in the Lighting Tools (such as light creation or light material changes) do not yet support USD lights.
Click the Lighting Tools button  in the Viewer tab, or press L on the keyboard to turn on Lighting Tools.

Read more about the Lighting Tools manipulators at How to Position Lights Using Lighting Tools.
Creating USD Lights - Practical example
Creating USD lights in Katana can be done natively using the UsdLight node or by converting Katana lights to USD lights using the KatanaToUsd node. The example below showcases a simple lighting setup using a combination of the above.
1 START
Let’s start by bringing in our scene. In this case, we are using the robot from one of the native USD example projects, which can be found under Help > Example Projects > Native USD > Exporting USD Data. Bring this into your project using a UsdSubLayerAdd node.
Click to expand the image

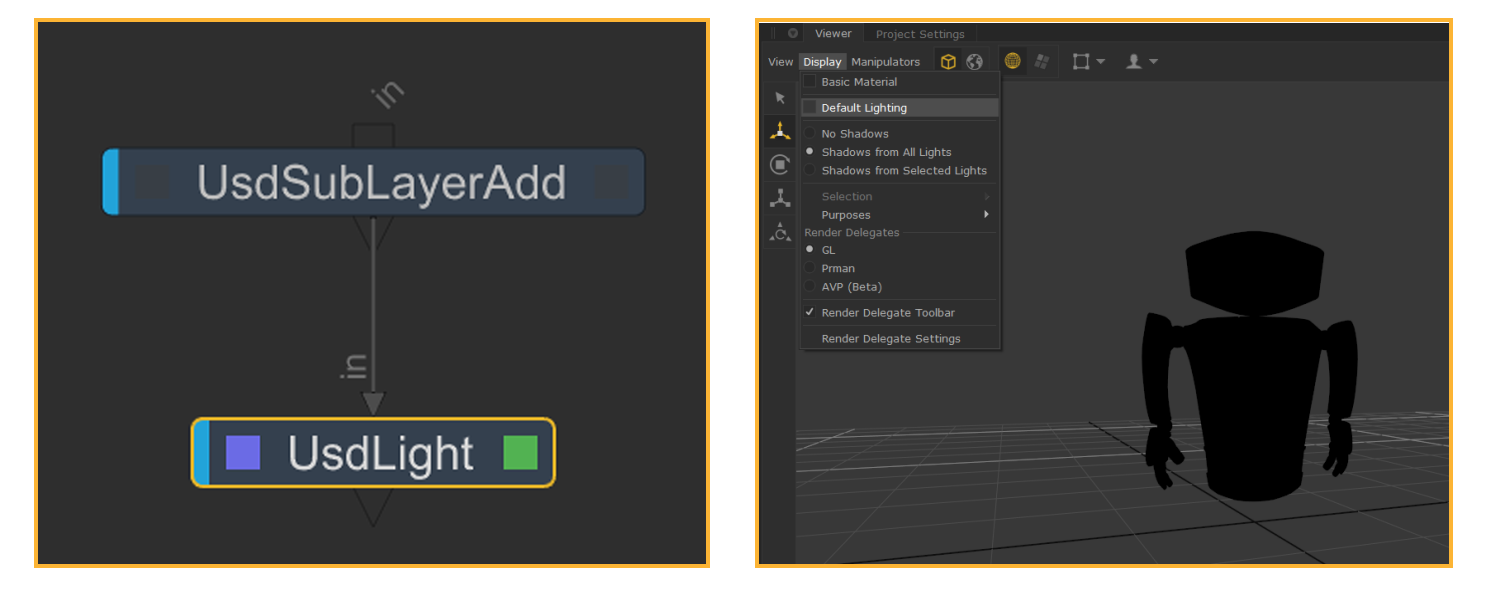
2
Start by placing down a UsdLight node and connecting it downstream of the UsdSubLayerAdd node. To get an accurate representation of our light in the Viewer, we’ll turn off the ‘Default Lighting’ option under Display in the Viewer tab. The robot will turn pitch black as we currently don’t have any lights in our scene.
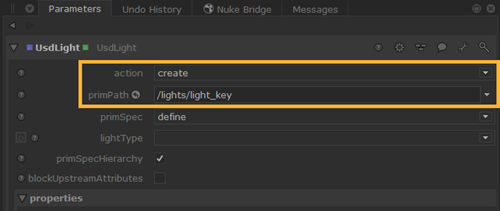
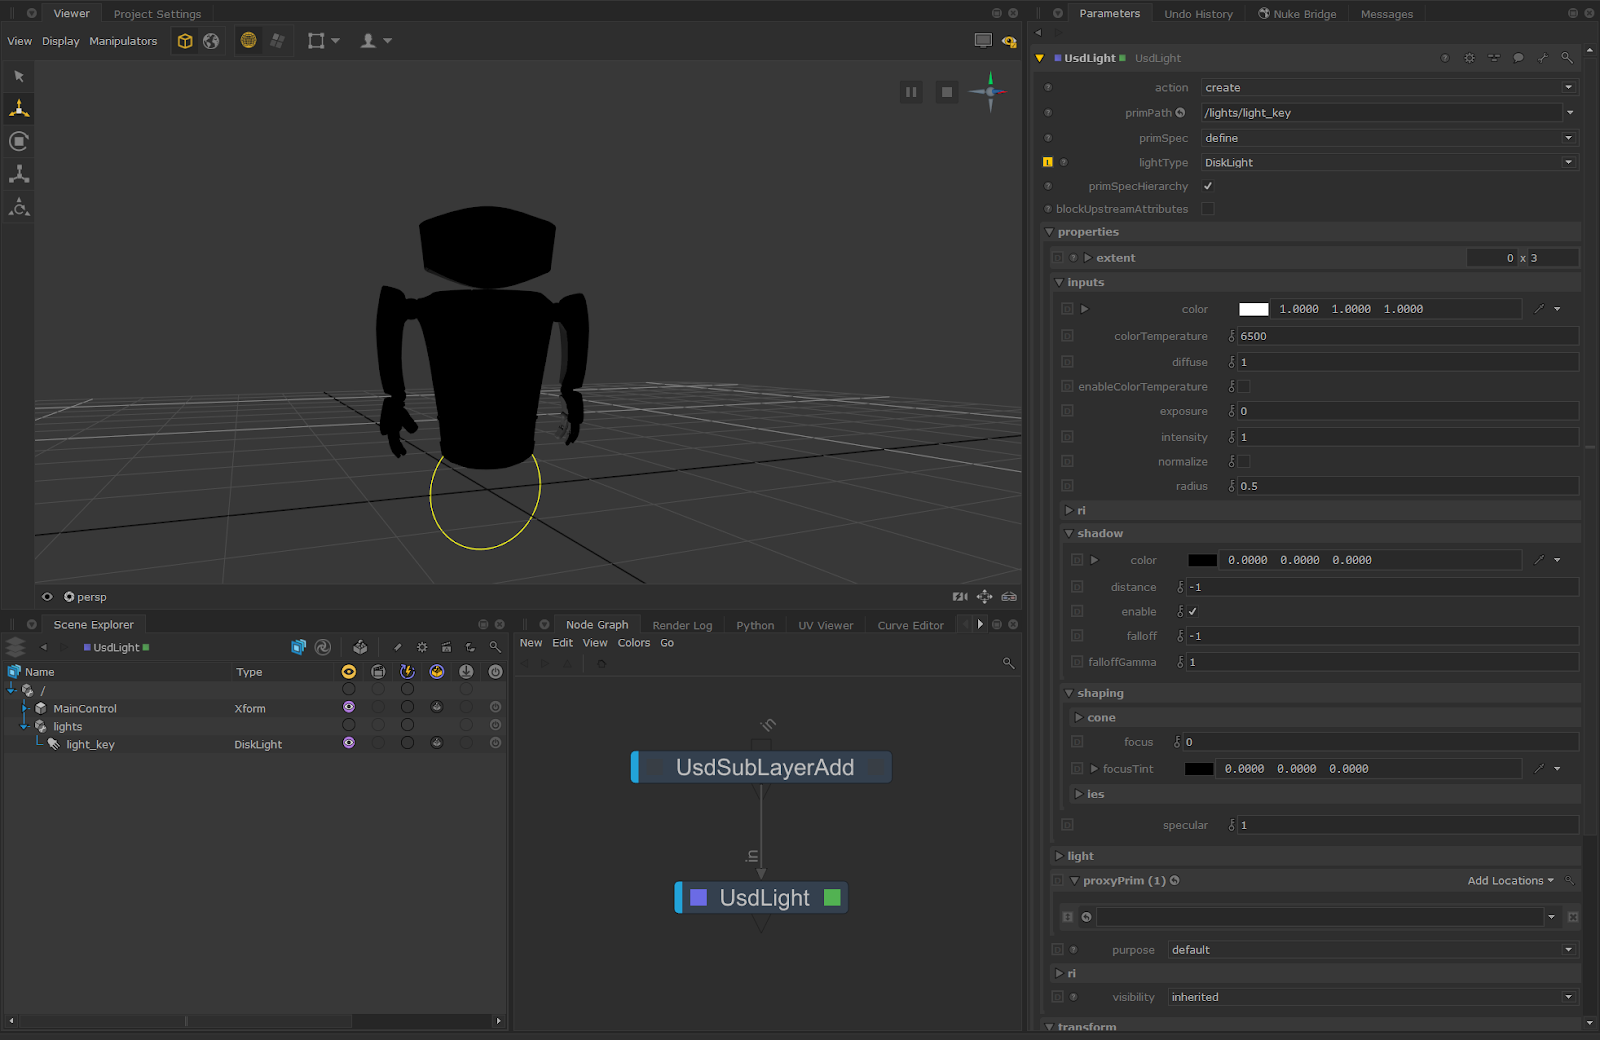
3
In our UsdLight node parameters, make sure the action is set to create and we’ll rename our primPath to /lights/light_key. You’ll see in the Scene Explorer that no light primitive is being created yet. This is because we need to define a lightType first.
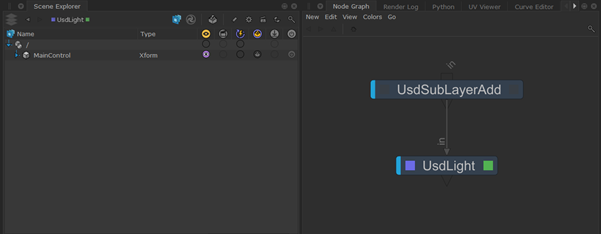
4
To define a lightType, click on the lightType parameter in the UsdLight node. This will show a dropdown with all the available lightTypes. It gets dynamically populated with lights that are available in the UsdSchemas. This list can vary depending on the version of USD you are working with and/or which render delegate is plugged in.
Let’s choose a standard DiskLight. It will show up in the Scene Explorer (don’t forget to toggle your Viewer working set or expand the light to see it in the Viewer) and the parameters will get updated in the parameters tab.
Click to expand the image
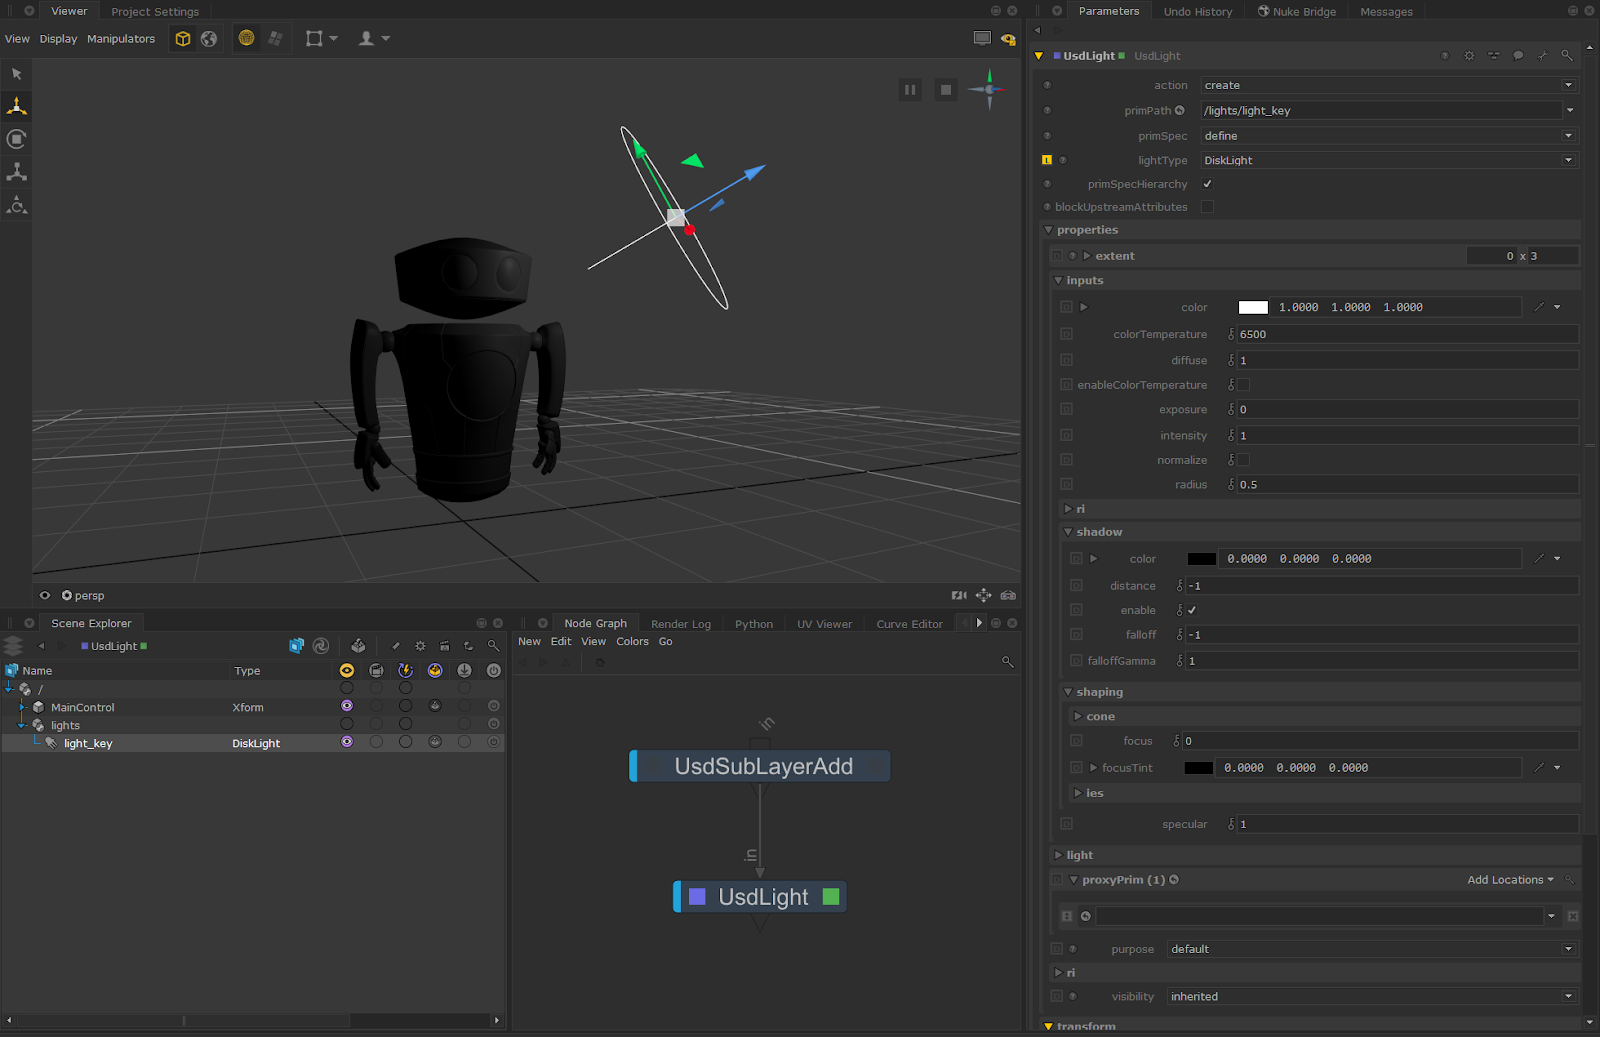
5
By selecting light_key in either the Viewer or the Scene Explorer, we can press ‘W’ in the viewer to bring up the manipulators. You can also use the manipulator buttons on the left side of the Viewer. Move the light_key to a position of your choice. You’ll see we are getting a preview of our lighting in the Viewer.
Click to expand the image
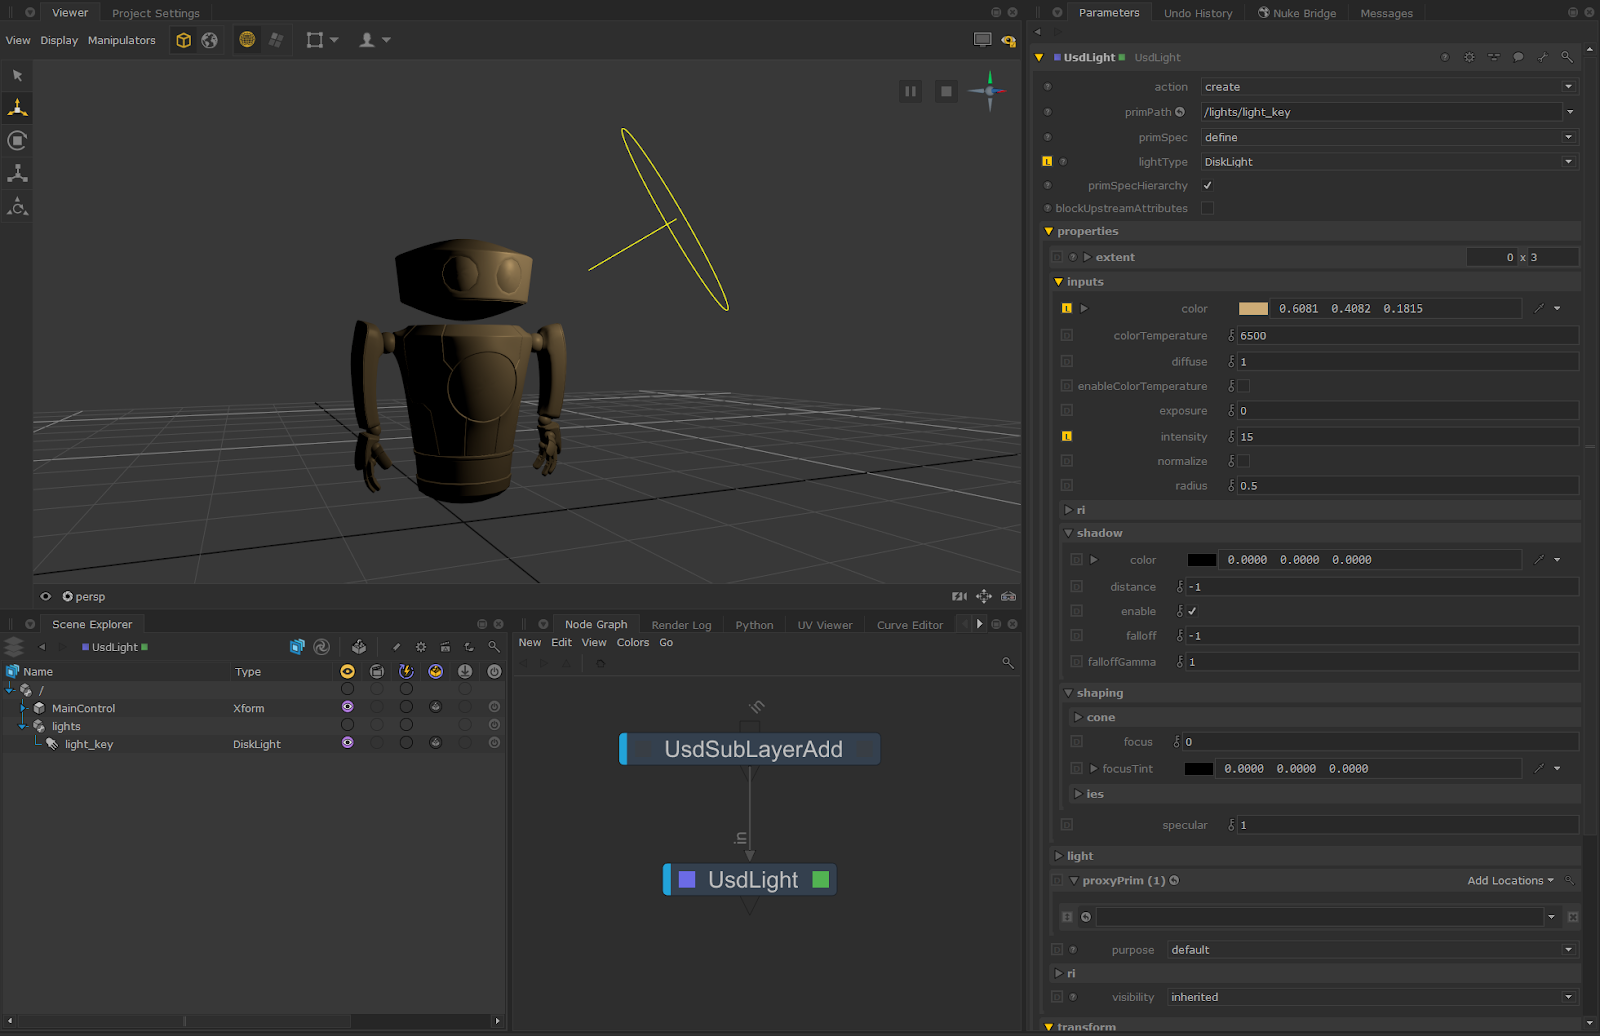
6
Next, we can adjust the light to our liking. Here, the intensity has been turned up, scale has been increased. and the color has been adjusted to an orange hue.
Click to expand the image
Note:
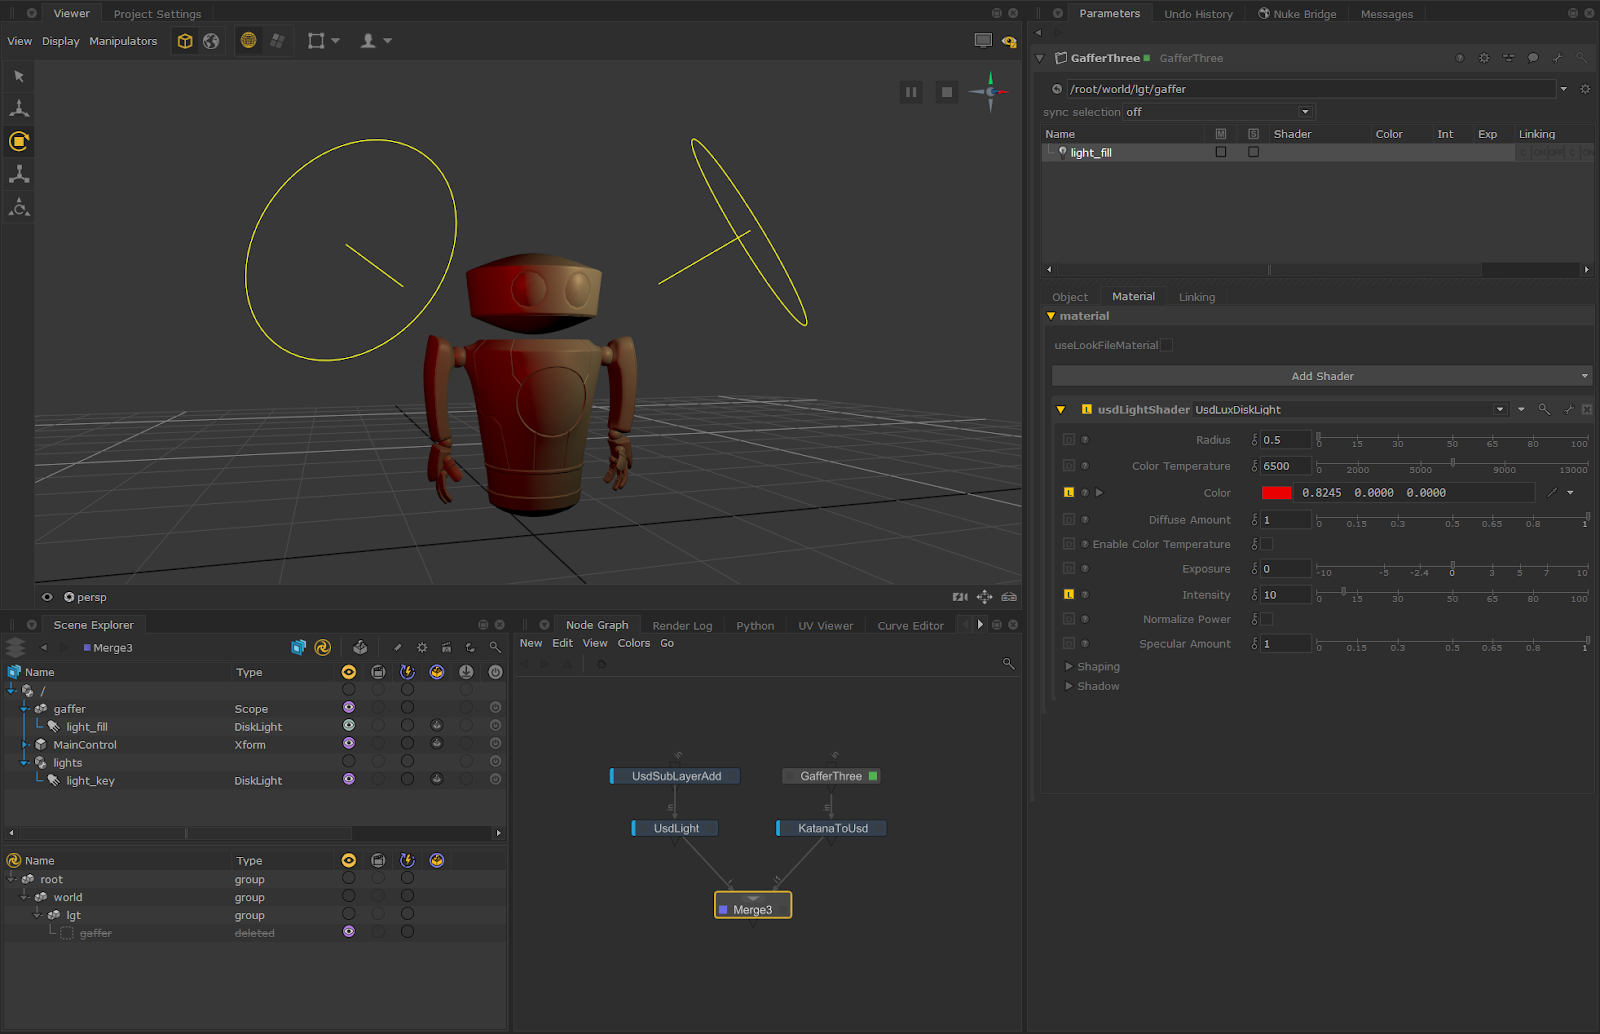
Another method of creating USD Lights is by using the GafferThree node and converting the Geolib lights to USD lights with the KatanaToUsd node. Here, we created a simple light and assigned it a UsdLuxDiskLight material, increased the intensity, and changed the color to red. We can see both previews of our lighting regardless of it being a Geolib or a USD light.
Click to expand the image
Editing USD Lights - Example
We can use the UsdLight’s edit mode to edit any incoming USD light whether it is being created by another UsdLight node upstream or being imported from a USD file into your project.
In edit mode, UsdLight will read the light primitive, dynamically set the lightType, and show incoming values in the Parameters tab. Any adjustments made will be set as an ‘over’ on the light primitive. We’ll use the previous example to show this.
1 START
Start by inserting a UsdLight node, changing its mode to edit and connecting it up to the Merge node from the example above.
Click to expand the image
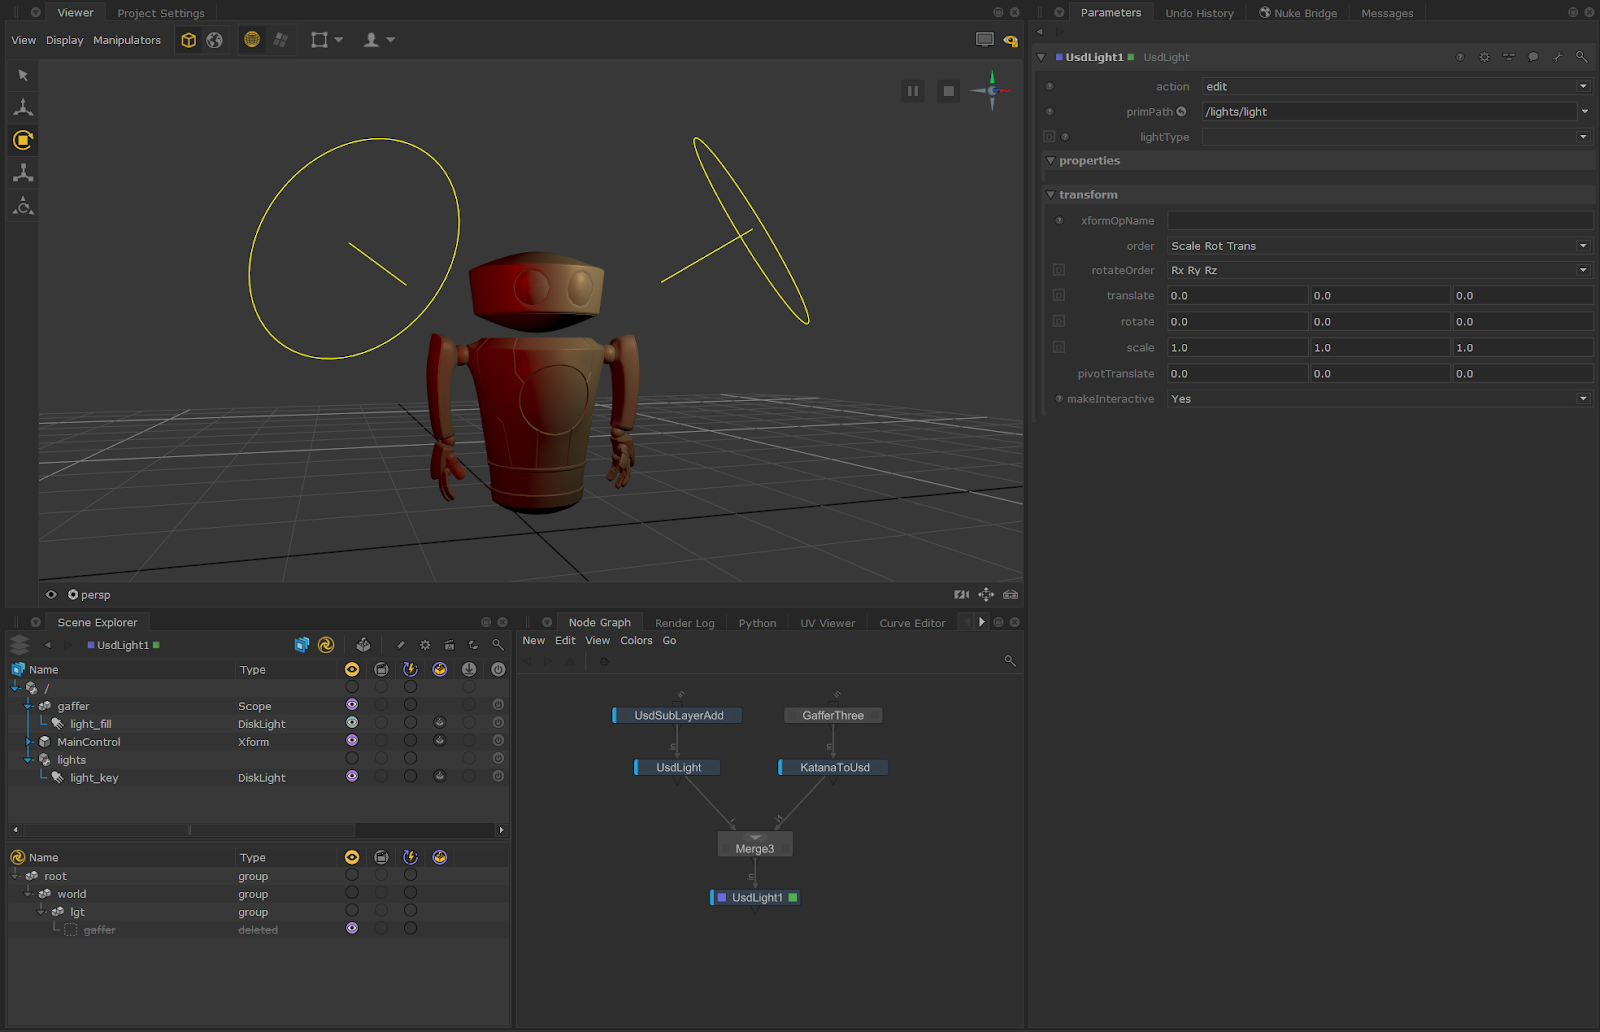
2
Drag and drop the light_key primitive from the Scene Explorer to the primPath parameter in the UsdLight node. This will automatically populate the parameters with the lightType, inputs, and the transforms.
Click to expand the image
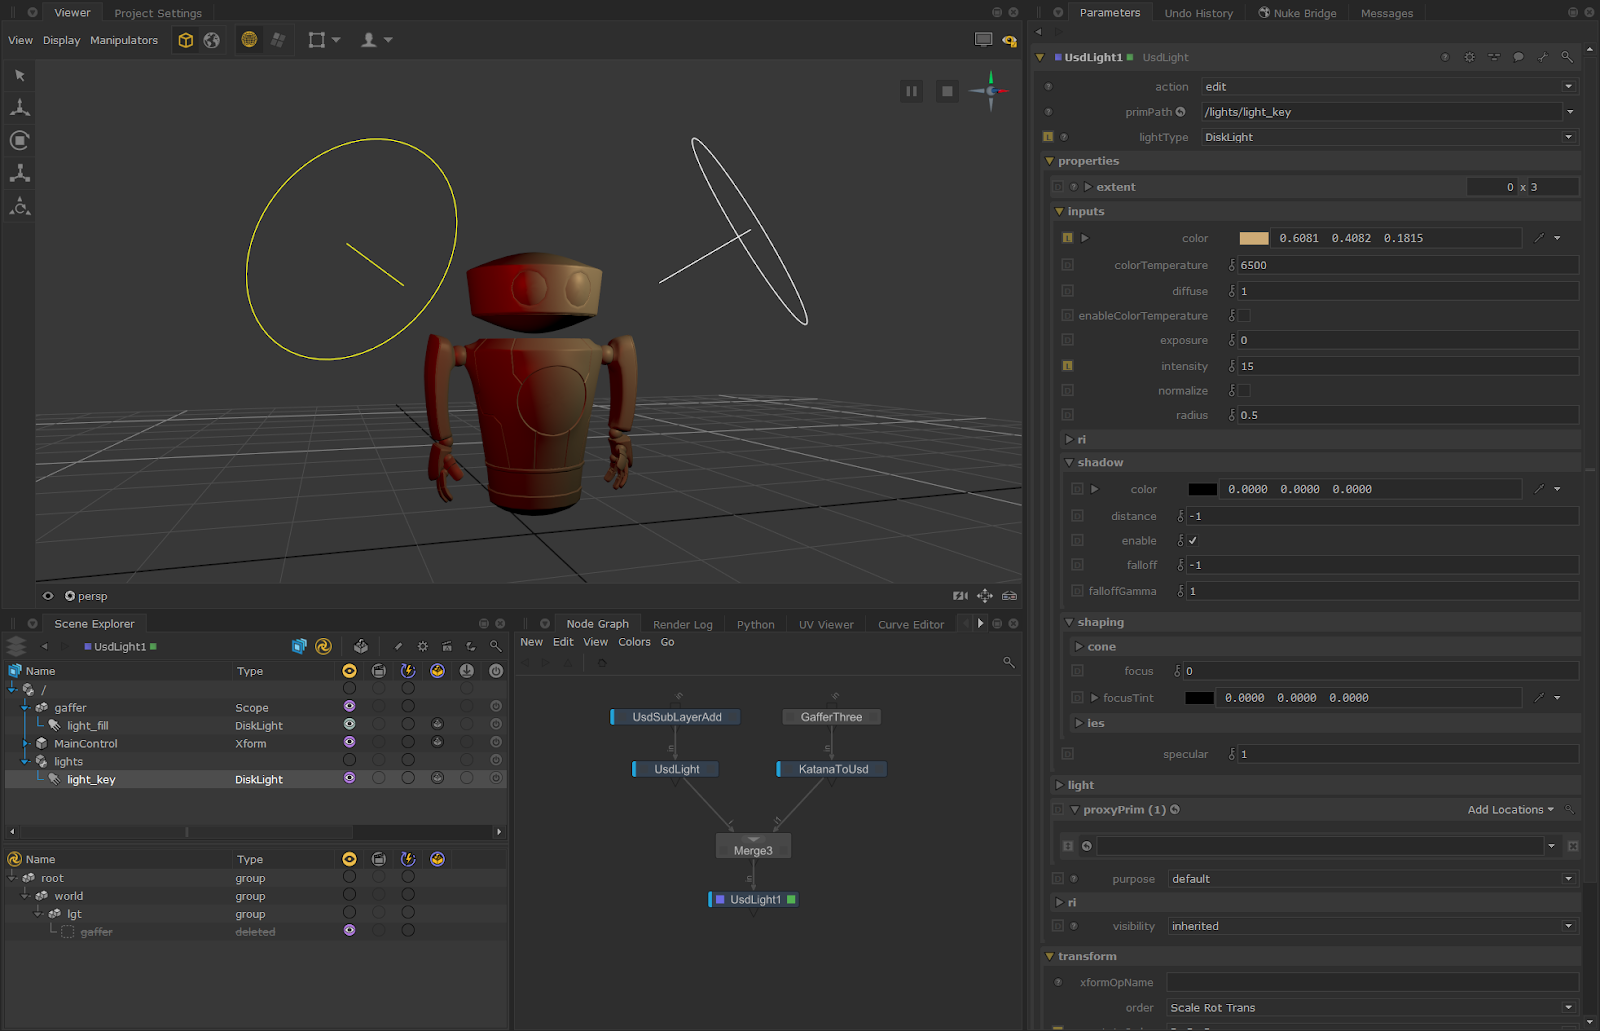
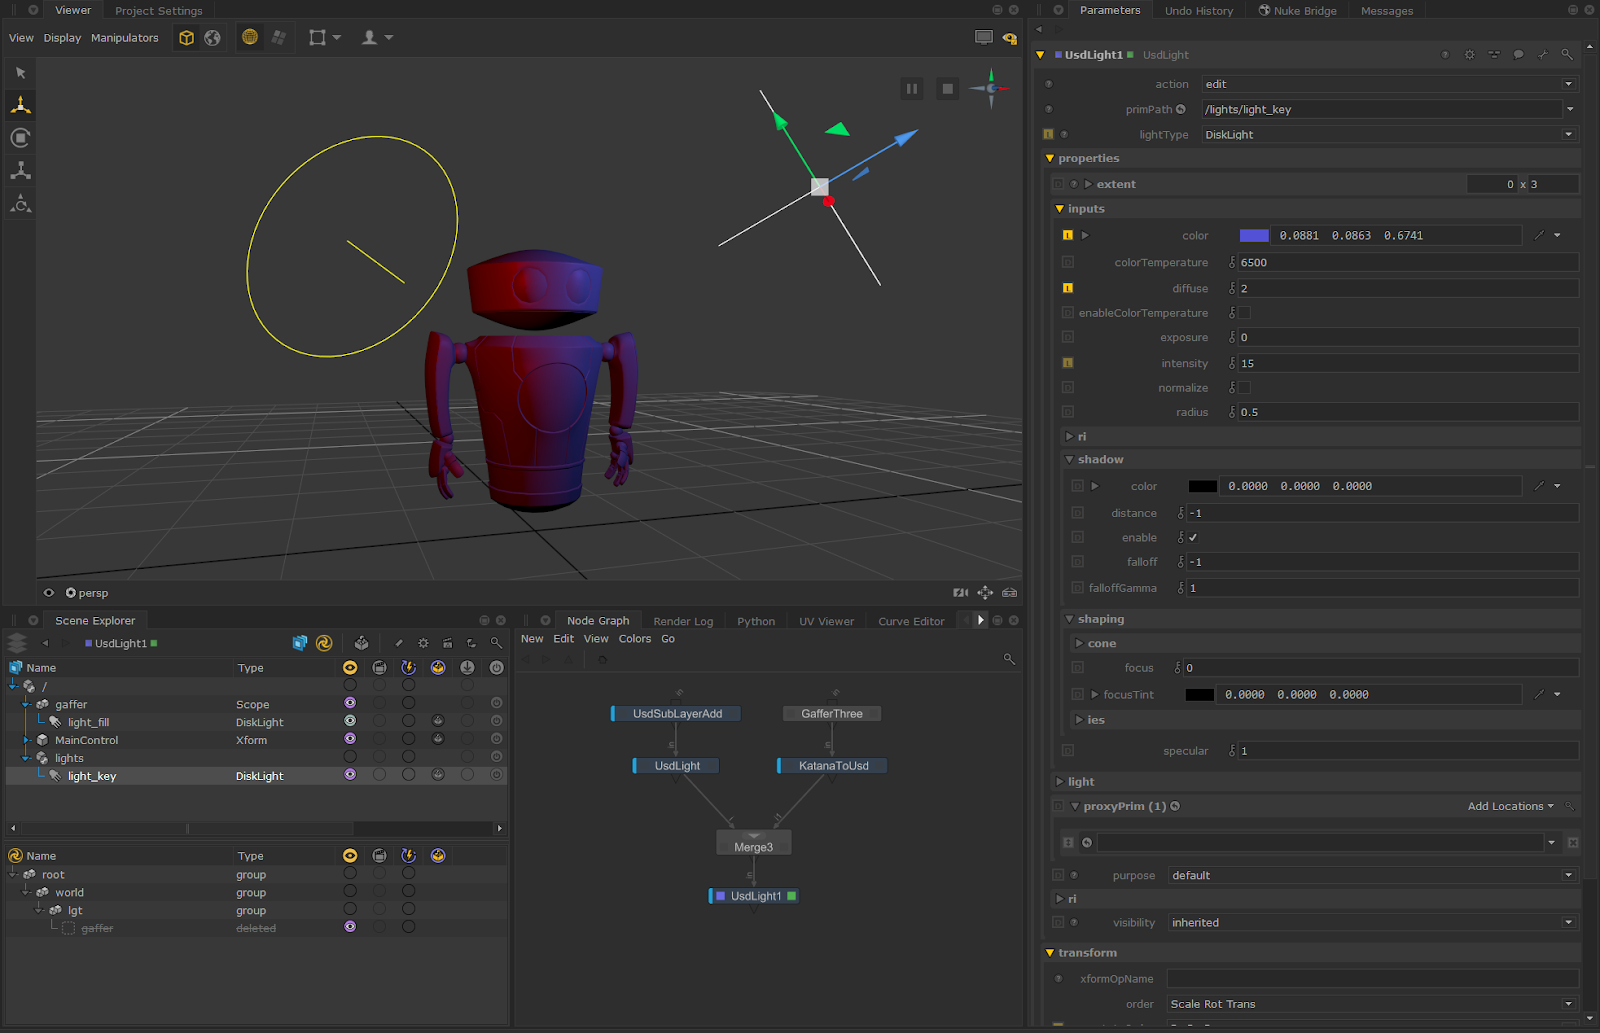
3
Now we can start editing the light. Here, we are changing the color to blue, increasing the diffuse to 2, and moving it a bit further away from our robot. You’ll see the light being updated in the Viewer.
Click to expand the image
4
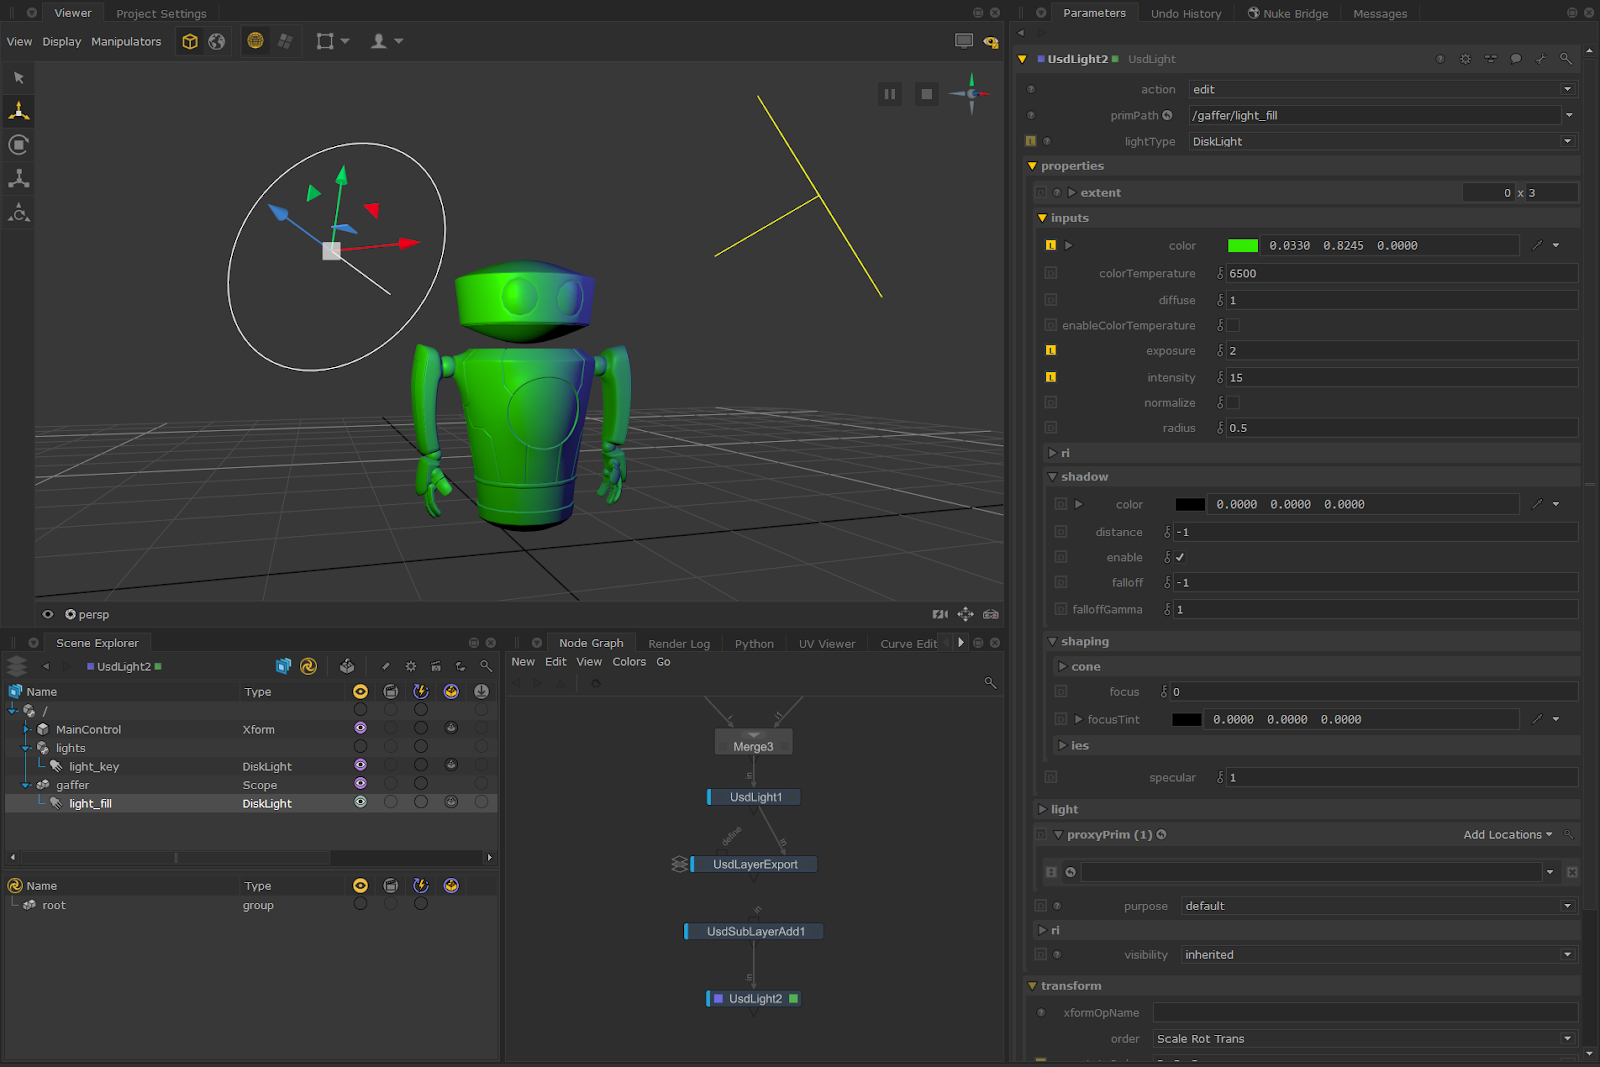
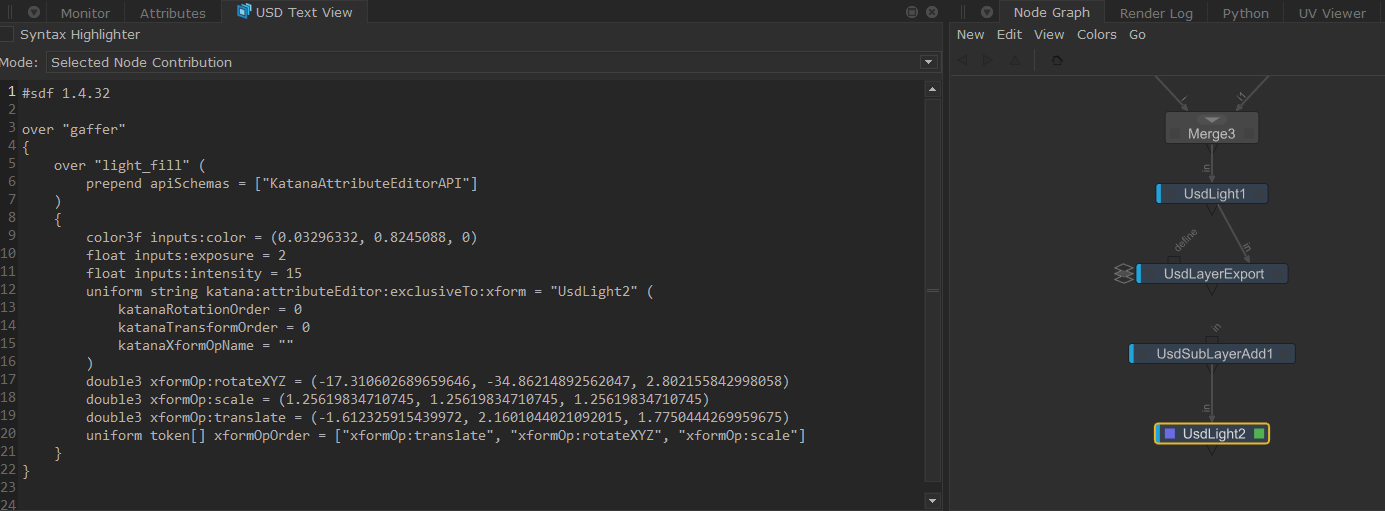
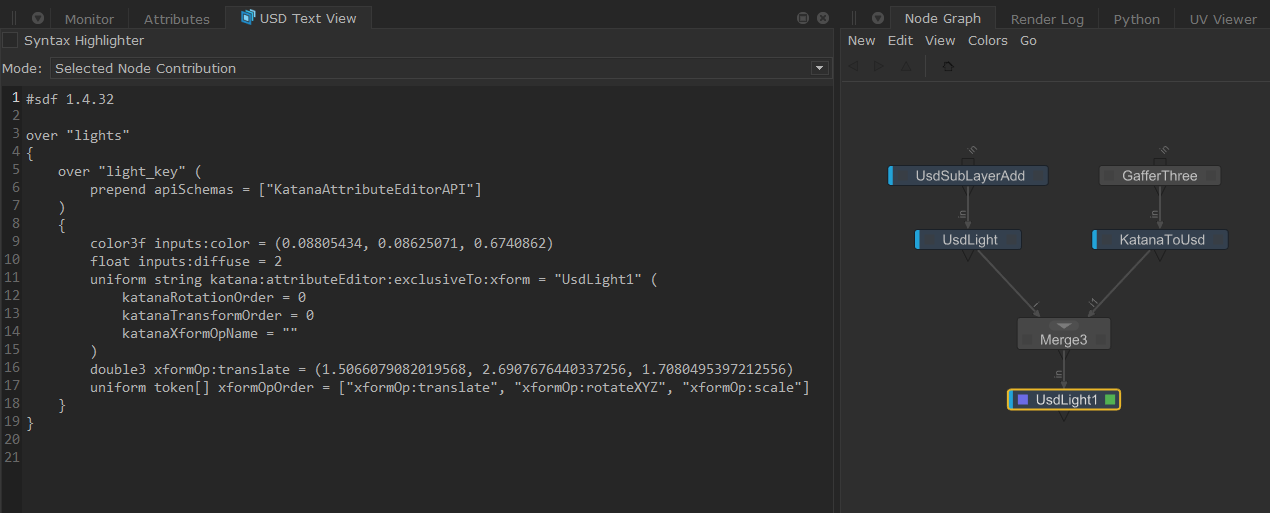
We can see our edits being written as ‘over’ with the help of the USD Text View and by selecting the UsdLight node.
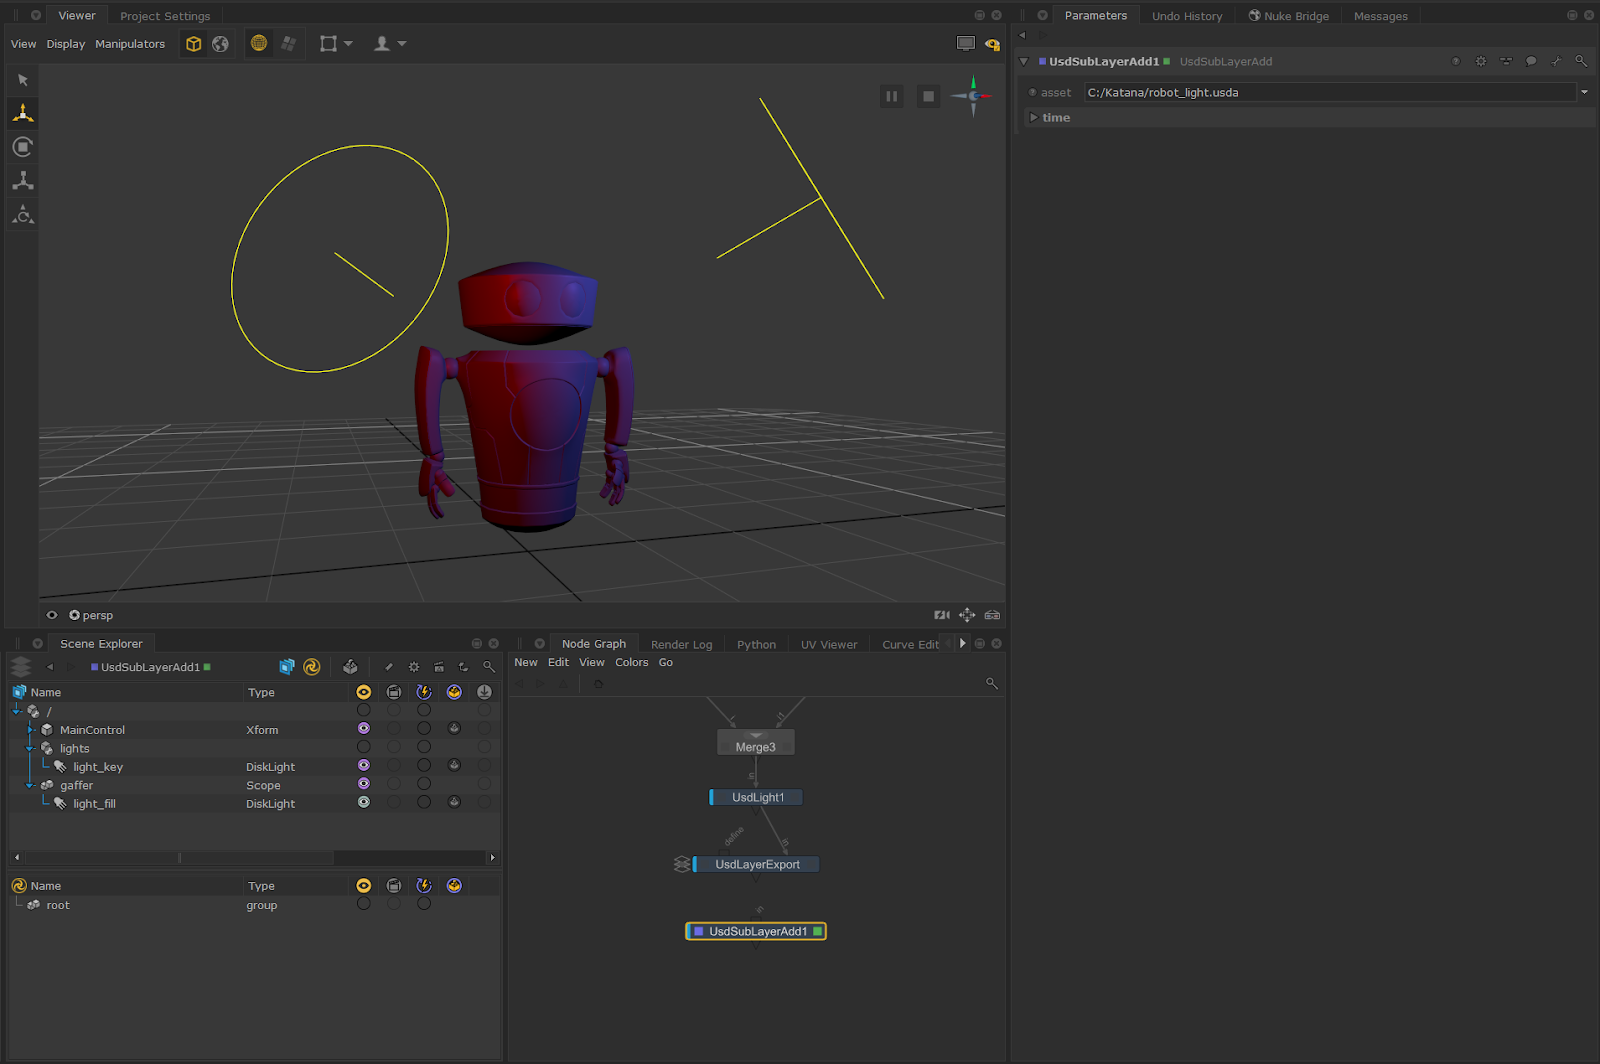
5
The same applies for USD lights that are being brought into your scene. To show this, we’ve exported our scene to a .usda file using the UsdLayerExport node and brought it back in using a UsdSubLayerAdd node.
Click to expand the image
6
Next, we can use a UsdLight node to edit these incoming lights with the same method mentioned above. Let’s change light_fill to green and change its intensity as well as its exposure.
Click to expand the image