Playback Controls
The Playback Bar enables you to control the playback of your project. It is visible across all workspaces so you can review any live changes.

Any cues you create will also appear in the playback bar. Go to Sequencing > Cues to learn more.
General Controls
Stop/ Start Playback

The above controls, from left to right, are:
• Previous cue
• Previous keyframe
• First keyframe
• Stop
• Start
• Last keyframe
• Next keyframe
• Next cue
Timeline

The timeline bar displays the start frame (green) and end frame (red). Right-click on the timeline to access the following options:
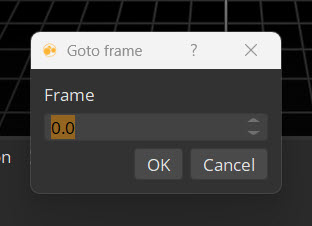
• Goto frame - allows you to input a specific frame and moves the current frame to that position.
• Goto current frame - centers the timeline on the orange current frame.
• Goto range start - goes to set range start.
• Goto range end - goes to set range end.
• Set current frame - moves the current frame to the selected area.
• Set range start - sets the selected area to become the start range. The start frame will move to this frame.
• Set range end - sets the selected area to become the start range. The end frame will move here.
• Label mode - selects the label option above the timeline:
- No labels:
- Timecode:
- Frame number:


Note: Label mode can also be set from Preferences, under Panels > Timeline.
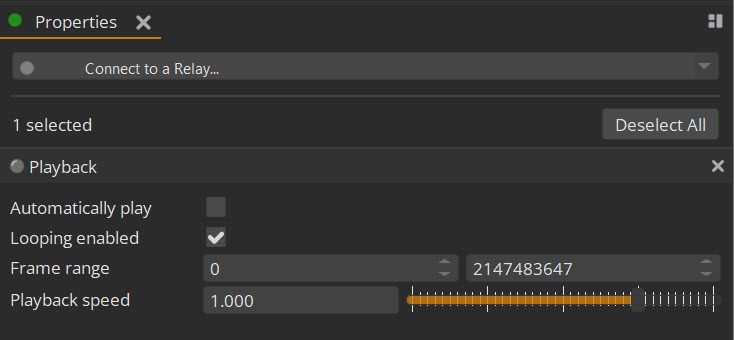
Playback Settings
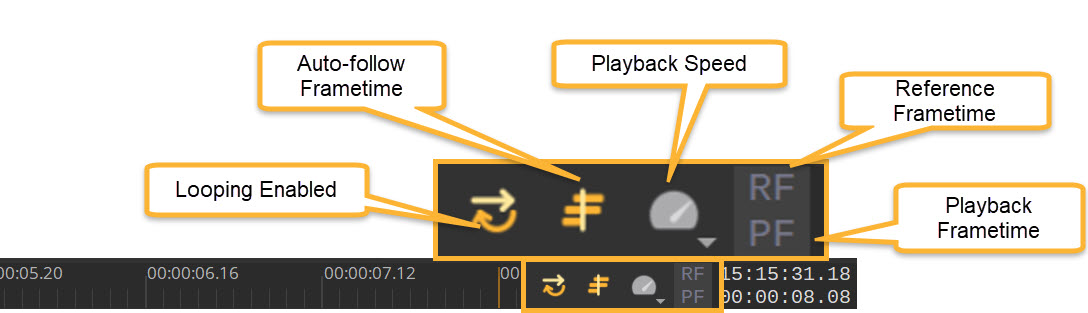
• Looping Enabled - when enabled, sequences will loop back to the start after they finish.
• Auto-follow Frametime - when enabled, the timeline will automatically scroll to keep the playback frametime in view.
• Playback Speed - the ratio at which the playback frametime advances compared to reference frametime. Click the icon to change the ratio:

Note: Reference Frametime framerate settings can be edited in Project Graph > Timecode
• Reference Frametime - the frametime returned by a reference device such as the system clock source.
• Playback Frametime - the frametime used for playback position.
These settings can also be accessed by clicking on Project Graph > Playback. This will display the Properties panel.