Configuring Cameras and Camera Tracking
Adding Tracked Cameras
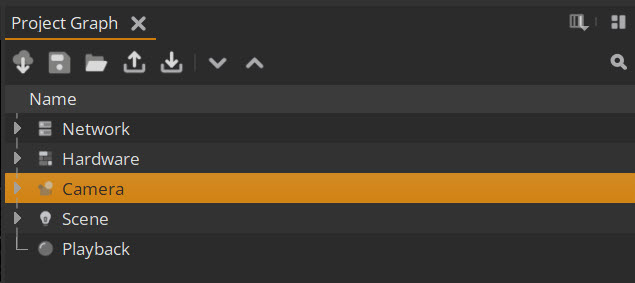
| 1. | To add tracked cameras to your stage, go to Project Graph > Camera. |
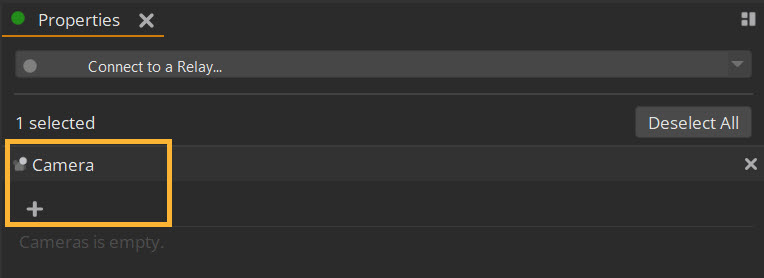
| 2. | From the Properties panel you can then add cameras using the + button. |
| 3. | Here you can set the Type of each camera, which is either inner (modelled on a real world camera) or outer (360 render for usage in the absence of any real world camera). |
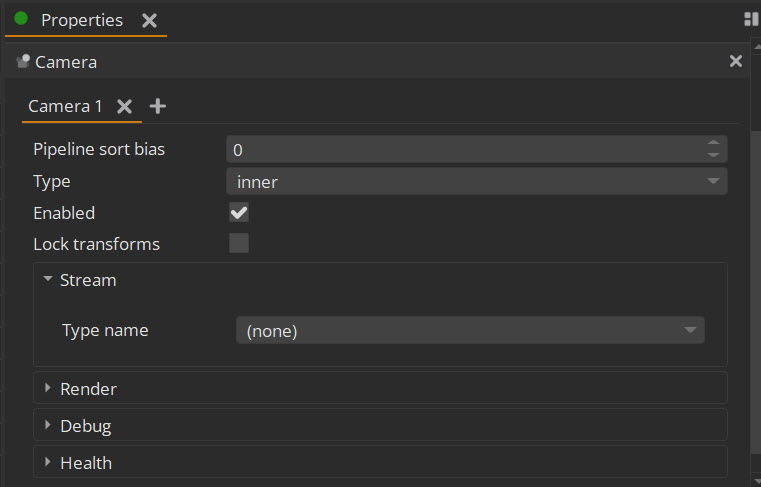
| 4. | For tracking, define the Stream under Type name. We currently support a number of camera tracking protocols as below: |
• Vicon
• FreeD - Protocol supported by Stype, Vive Mars, Stage Precision and others
• MoSys - F4 protocol
• SteamVR
• TCD - Protocol used by EZTrack
We also support a number of utility inputs which can be used for user control and debugging:
• Constant - user defined camera with a constant position
• Debug - debug camera with movement defined by Amplitude and Frequency
• USD File - Read a camera directly from a USD file
• Gamepad - Control camera from a gamepad, support includes Xbox, PS5 and other gamepads which can connect to a Windows machine.
| 5. | Once you choose a Stream type, you can then specify stream Parameters, such as IP Address and Port for UDP-based streams or the Camera name for a Vicon stream. |
| 6. | Once you set up the stream-specific parameters you should see the camera in the Viewport as below. The inner camera will resemble a frustum while the outer camera will appear as a cube. |
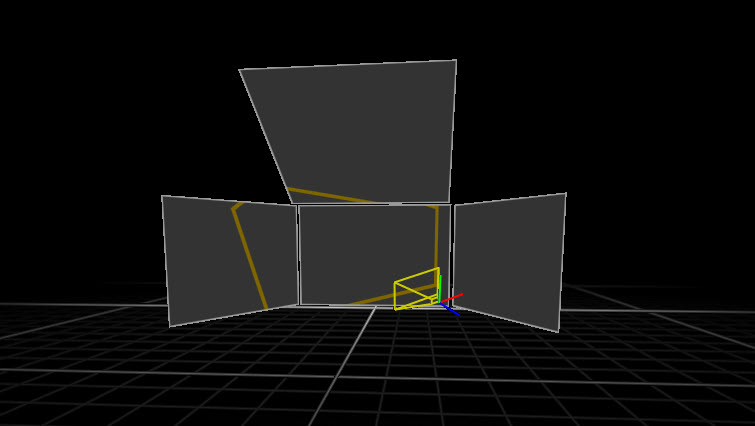
Note: The camera data is read by the Relay so you must be connected to the Relay to see the camera.
See Editing Camera and Cinematic Parameters to learn more about camera settings.