Quickstart Guide: Loading and Editing a 360° Driving Plate
In this example we are going to use the 360° driving plate sample project (accessible from the Nuke Stage download page, in the folder nuke_stage_sample_spherical_360_plates.zip), and map it onto a mesh. To do this we will use Nuke Stage’s Scene Graph and Node Graph.
Loading a 360° Sequence
|
1.
|
In the Scene Graph, right-click to get the context menu and click Add mesh > Sphere. This creates a Sphere USD primitive. |
|
2.
|
Scale the Sphere using its Transform > Scale property. Eg 30.000, 30.000, 30.000. |
|
3.
|
Right-click the sphere in the Scene Graph and select Create texture override. You will then be able to map texture to the sphere. |
|
4.
|
Go to the Comp workspace and open the Node Graph panel. |
|
5.
|
A Constant node will have automatically been created. Replace this with a Read node and ensure it is connected to the Output node. |
|
6.
|
Use the Pattern property of the Read node to select the image file you want to display on the mesh (with the sample project, this is: Daytime_Car_PlatePro_Stitch_2k_#####_v001.exr (0001 - 00240)). |
|
7.
|
You can now use the Playback Controls to play your scene to see it on the mesh as well as on the displays. |
Editing the Sequence
Now you’ve set up the driving plate, you can customize your scene using the Node Graph. Below are a few examples of edits you can try out:
Grade Node
You can use the grade node for real time compositing on the wall, so you can see the visual changes on the physical set.
You can make these adjustments using two methods:
|
1.
|
Click the grade node you want to edit. Then make adjustments in the Properties panel for that node by using the sliders or inputting new values. |

|
2.
|
Alternatively, navigate to the Grade panel which appears in the same workspace as the Node Graph once you create a grade node. Click on the node you want to edit and make adjustments to the colorwheels or the sliders. You can choose between RGB, HSV or TMI color models to edit. |
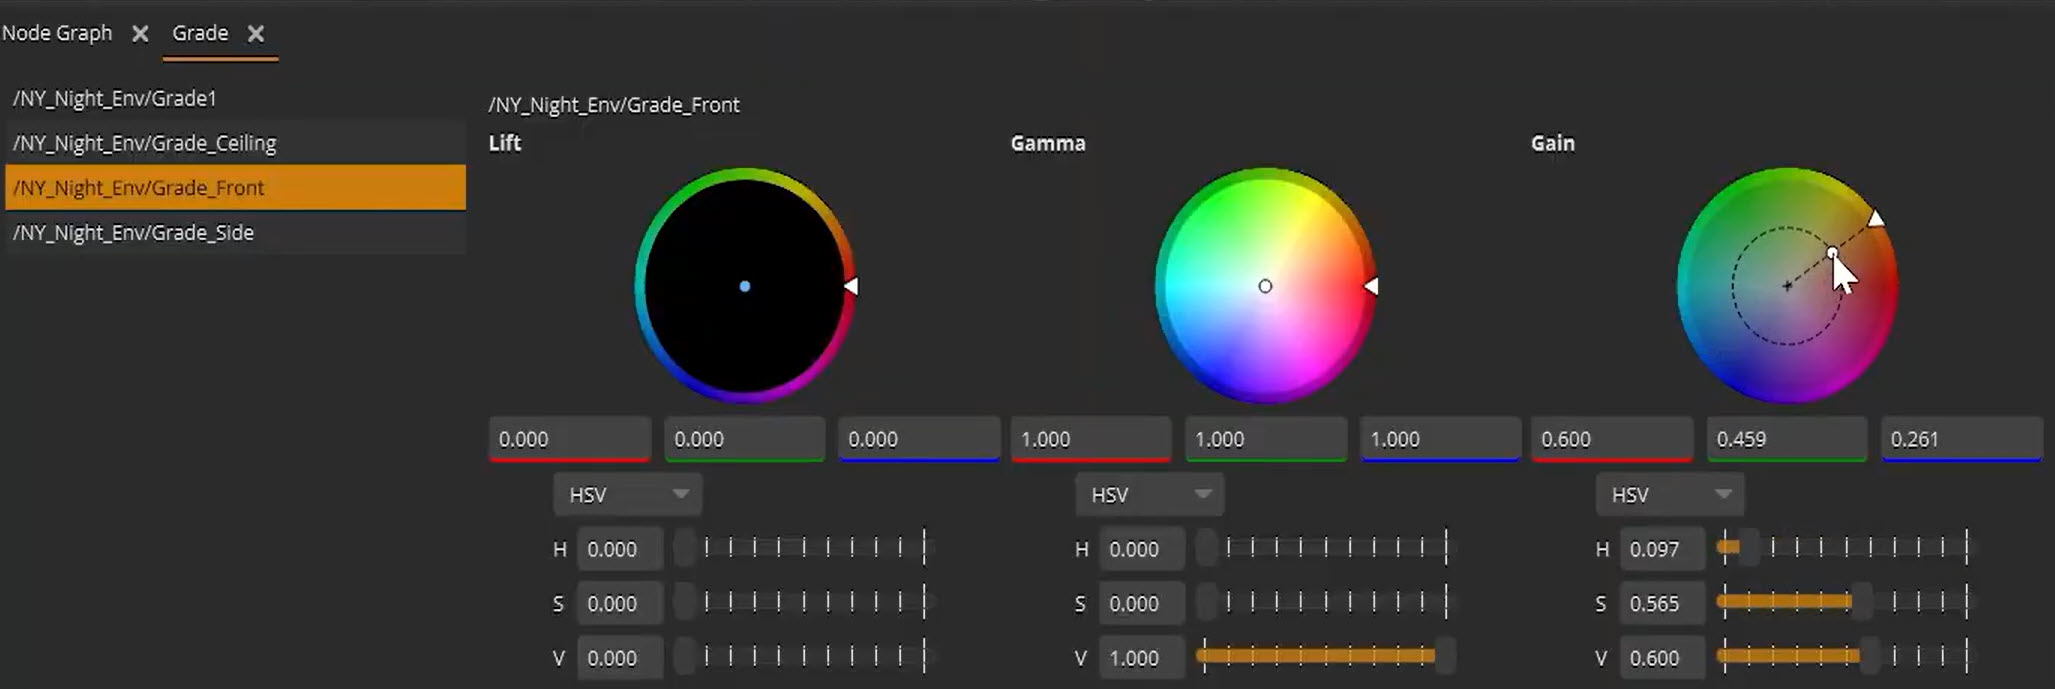
Note: Nuke Stage’s Grade node matches Nuke’s Grade node.
Exposure Node
The Exposure node can be helpful in manipulating content using the language of imagery by adjusting f-stops.
Switch Node
You can also use a Switch node to change the output of the display, such as to make a greens screen effect or to enable/disable Markers and Lightcard.
Switch Nodes are also a useful way of having variations in your environment by using Texture Overrides. For example, it can be used in a driving scene to switch between different types of city traffic, enabling you to customize your scene instantly on set.
Make a Green Screen
|
1.
|
Create a constant node. |
|
2.
|
Change the color to green. |
|
3.
|
Connect it to a switch node so you can toggle between enabling the effect. |
|
4.
|
Connect the the switch mode to the other input (eg the scene input). |
|
5.
|
Connect the switch node to an output node. |
Note: These are just some of the ways you can edit your driving plate scene in Nuke Stage. Our User Guide provides more information on how to edit your Nuke Stage project - a good place to start is Editing Your Scene. The Nodes section of the Reference Guide includes a complete list and functionality of all Nodes available to use in Nuke Stage.