Quickstart Guide: Setting Up the Project Graph
The Project Graph is the hub of all project preferences in Nuke Stage. To set up your project to your specifications, we can work down the project graph and edit the parameters.
Now that the Networking has been set up, the next element to define is the Hardware:
Step 1: Outputs
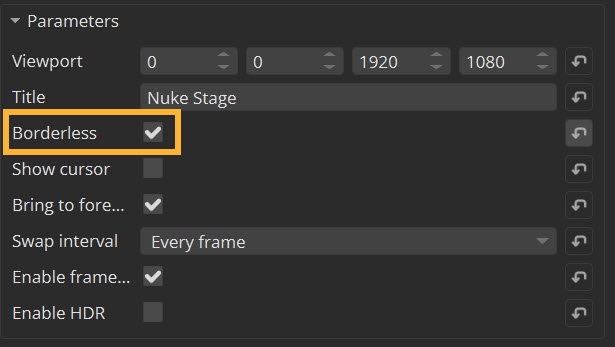
| 1. | Go to Project Graph > Hardware > Outputs. Add a new Output. |
| 2. | In the Viewport property, input the resolution your RenderNodes are delivering. This should be the complete size of your display. The first two inputs indicate the position of the viewport as X and Y, and the second two inputs define the size of the viewport. |
This quickstart example uses 0, 0, 3840, 2160, for a RenderNode delivery of 4k.
| 3. | Enable the Borderless checkbox so that the window title chrome will be hidden. Ticking this box is crucial in ensuring sync functions properly. |
Step 2: Displays
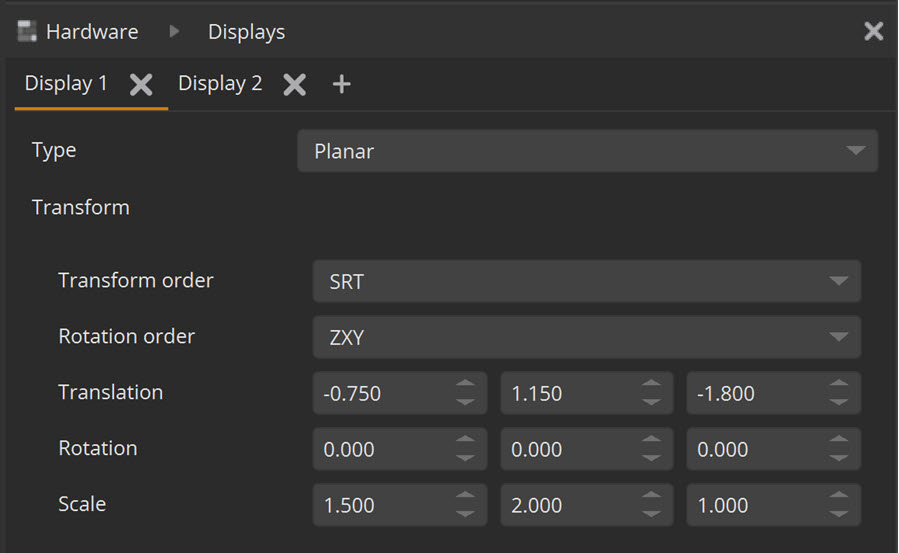
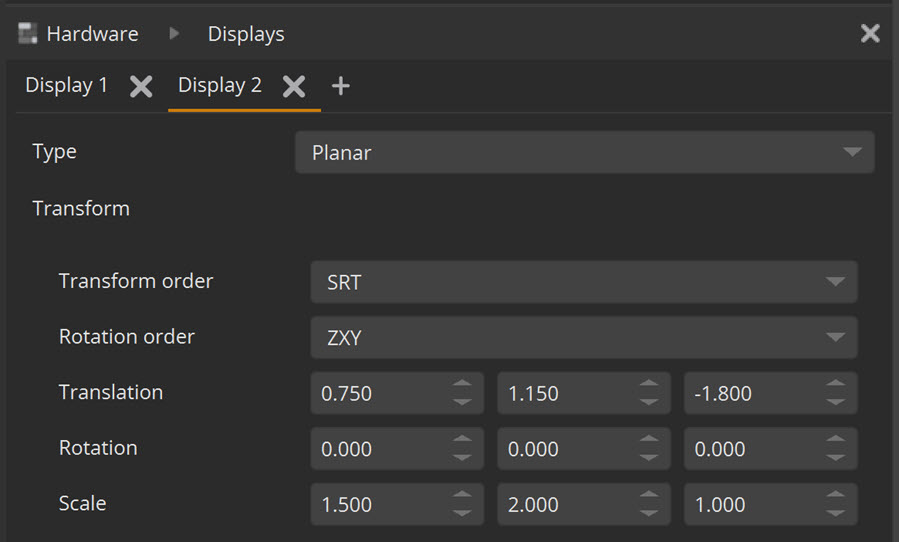
Now you can define the physical LED displays within the Stage Editor.
| 1. | In Project Graph > Hardware > Displays, add two displays and match their dimension and position in reality using the Transform property. This ensures they will align with the tracking system. |
Note: The default displays are planar, but you can also load custom display meshes in common 3D formats, such as .obj and FBX.
An example of two display positions for two LED screens:
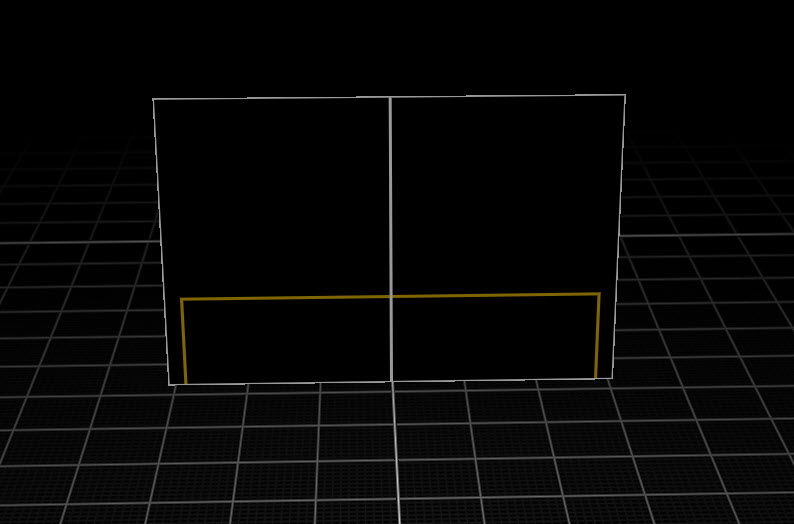
The displays in the Viewport:
| 2. | In the properties of each display, go to Output mapping and define the output and RenderNode that is connected to the Display. In this example, RenderNode 1 will be linked with Display 1 and RenderNode 2 paired with Display 2. Output 1 will feed both displays. |
| 3. | Now you have connected the RenderNodes and Outputs to the displays, you will see your LED screens go fullscreen and borderless. |
Step 3: Cameras
Before bringing in content, define your cameras:
| 1. | Go to the Camera tab of the Project Graph. |
| 2. | Add 2 cameras. In the Type property, define one as an inner camera and one as an outer camera. |
- The inner camera is a typical camera used for rendering from a single point of view, and will normally be linked to a tracked stage camera.
- The outer camera is an environment map render of the entire scene, used to provide lighting.
| 3. | Change the inner camera’s Stream property to Type name Constant (or the tracking system you are using). |
| 4. | Adjust your camera position (in this example the Y axis is set to 1.000) |

| 5. | Set the outer camera to Constant and also adjust the camera position so it matches the inner camera. |
You can export your configuration settings so you don’t have to repeat this set up process multiple times. To learn more, go to Saving Stage Configuration.
Now all the networking, hardware and cameras have been set up, you can import a scene onto the stage. You can use the following workflows to get you started:
• Quickstart Guide: Exporting Your Scene from Nuke
• Quickstart Guide: Loading and Editing a 360° Driving Plate